AWS Lex is a powerful service by Amazon Web Services that enables developers to build conversational interfaces like chatbots and voice assistants quickly and efficiently. With AWS Lex, creating a chatbot becomes streamlined, as it provides deep learning functionalities for automatic speech recognition and natural language processing. AWS Lex integrates seamlessly with other AWS services, which allows it to leverage features such as user data management, advanced analytics, and security configurations. Amazon Lex is a service by AWS for building conversational interfaces into any application using voice and text. Lex has quickly become popular among chatbot enthusiasts. Notably, popular Amazon products such as Alexa are powered by the same technology as that of Amazon Lex.
For those new to building chatbots, a Lex AWS Tutorial is an excellent starting point. It introduces the core concepts of AWS Lex and provides hands-on guidance, helping developers utilize its advanced tools for creating interactive and responsive bots. With comprehensive support from AWS, Lex AWS Tutorial resources make chatbot creation accessible and effective, ensuring users can build customized, scalable chat solutions with ease on the AWS platform. By utilizing AWS Lex, businesses can enhance customer engagement through personalized and intelligent conversational experiences.
Once you log into your AWS account, you will have to navigate to the Amazon Lex section. Just search for Amazon Lex in the top search bar or select one from Services, as shown here:
Select Create bot from the menu and you are ready to get started with building your first bot.
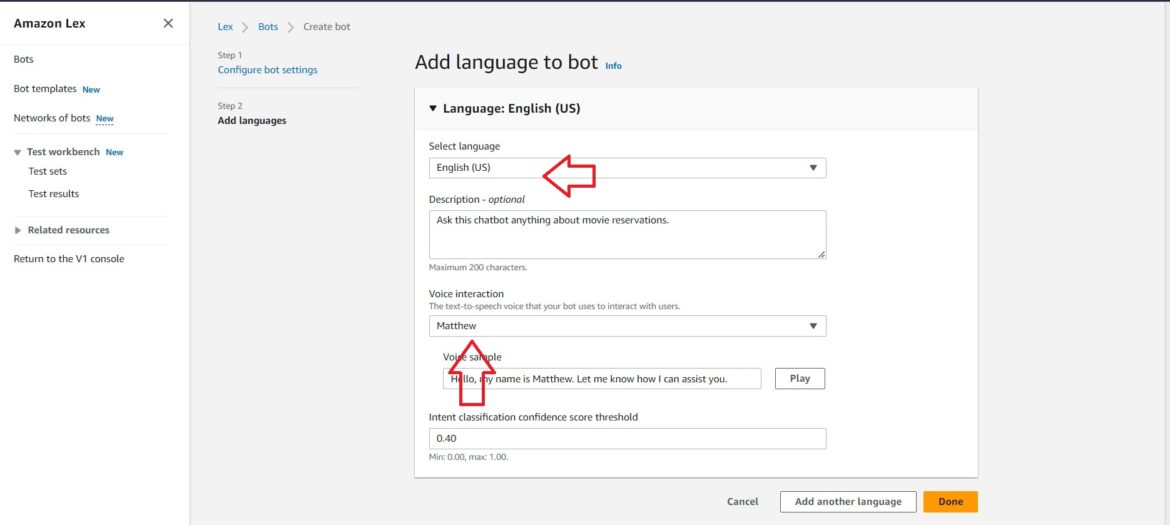
On the next page, Amazon Lex asks you to enter the language in which you want your bot to communicate.
We will now come to the Intents page. This is the page where you define the name of your intent and also get the initial input from the user.
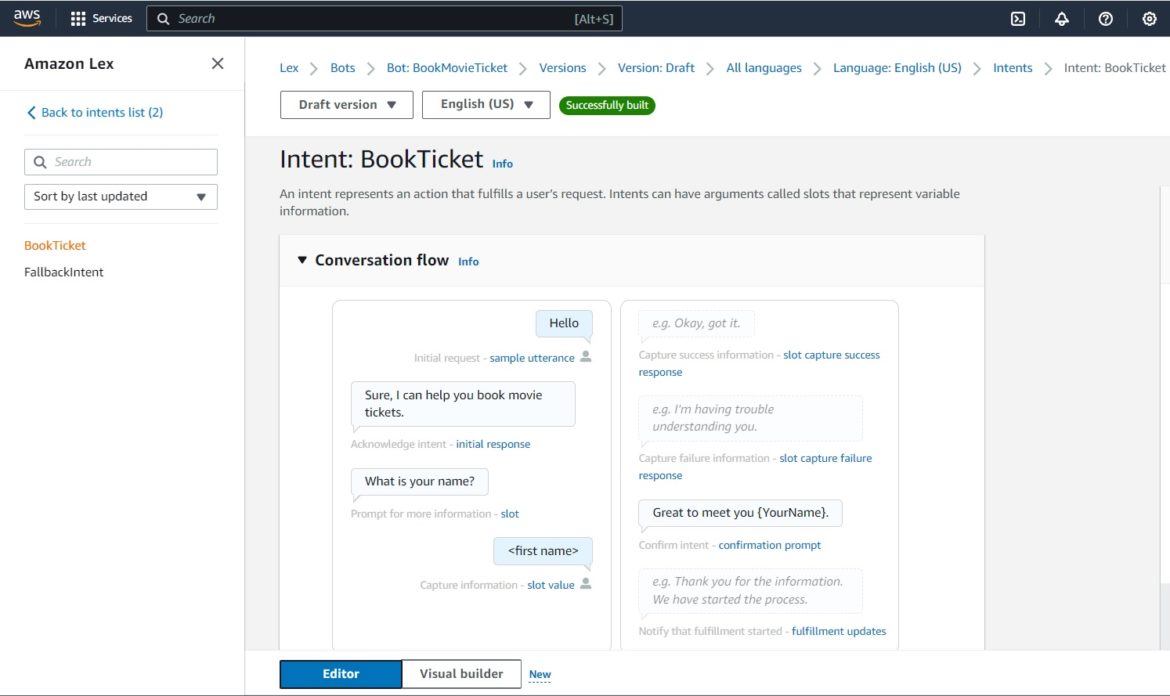
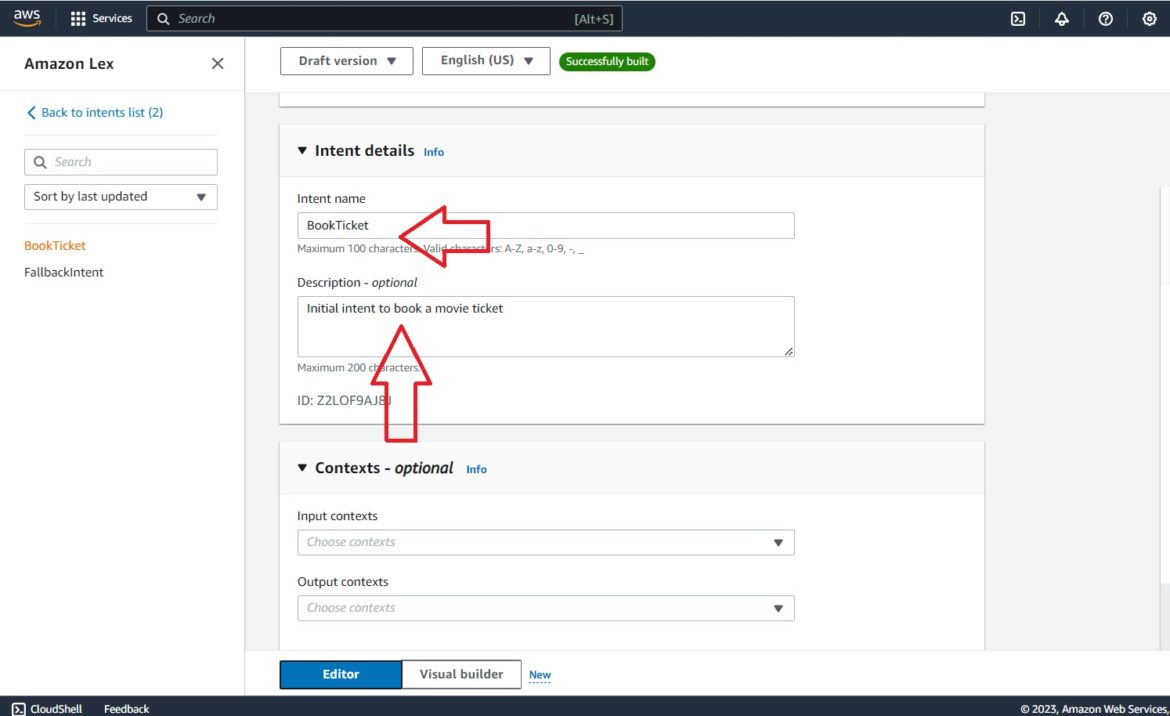
In the “Intent Details” section, name your intent and also the description of your intent so that it is easy for you to remember what that intent does.
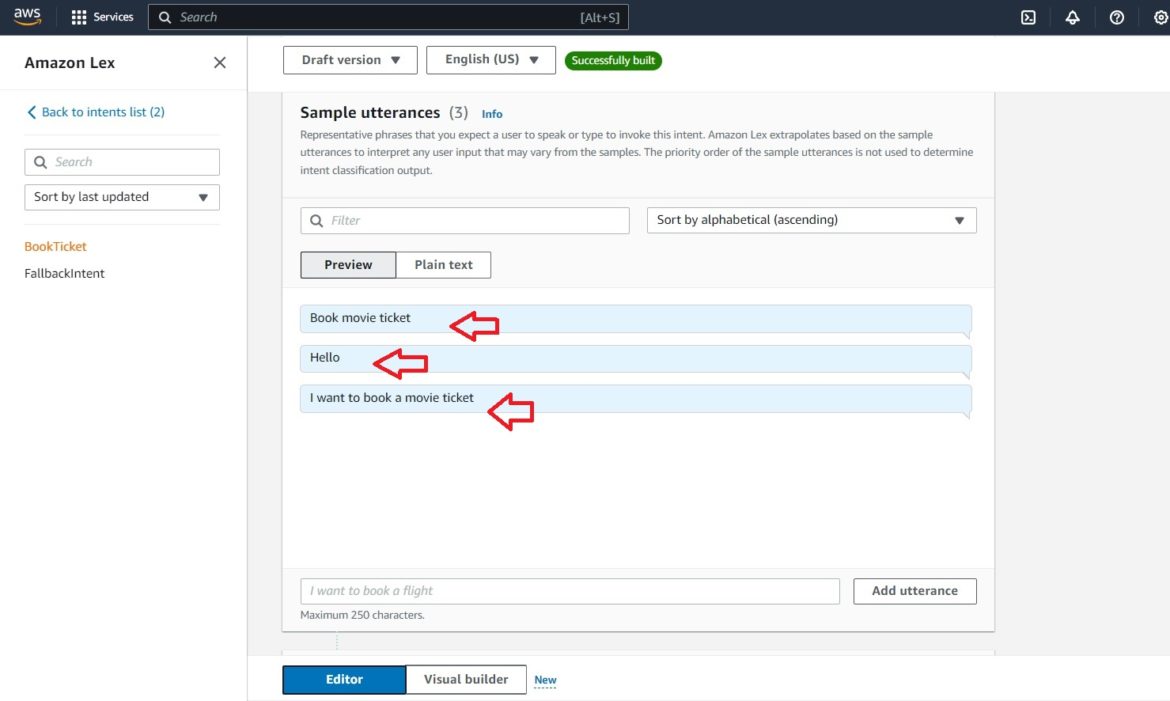
Next comes the “Sample utterances” section, where you can specify the probable questions that a customer might ask your bot.
Scroll down further on the screen, and give an initial response.

We can then add a “Slot,” which is where Amazon Lex stores the username. We have to define a prompt here, give a name to the Slot and specify a Slot type.
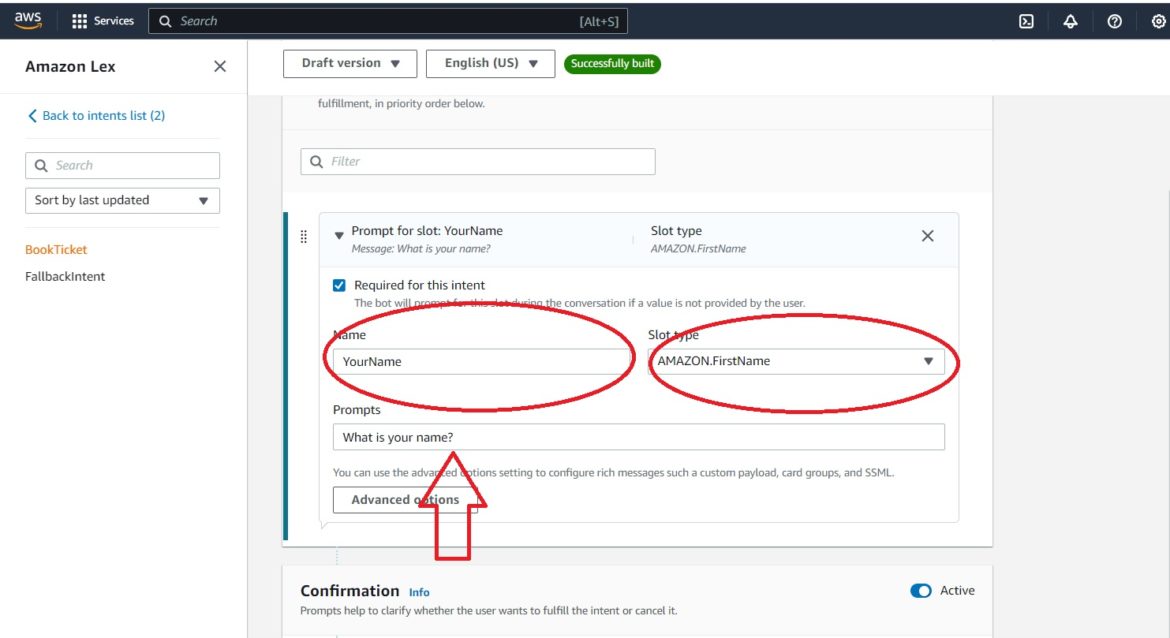
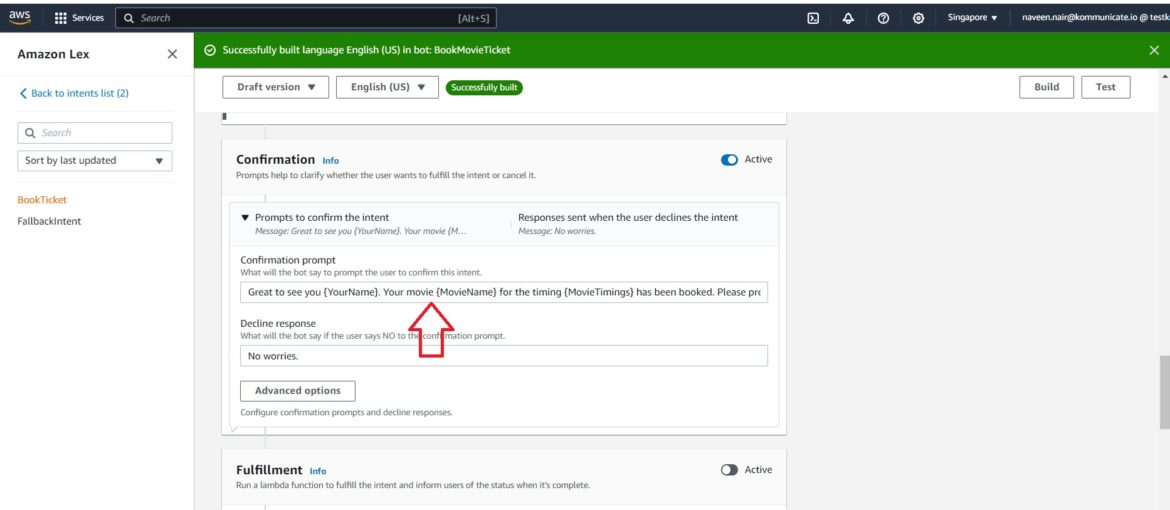
The final part of fetching the Username is to write down the confirmation message in the Confirmation section. The Slot name is “YourName,” and the Slot type is “AMAZON:FirstName.”

We now have a small, basic working chatbot on Amazon Lex which greets you on your website and asks you your name (and remembers it too.). It is now time to add options to your chatbot. Once you have hit the “Save Intent” button, go back to the Intents List on the top left of the screen.
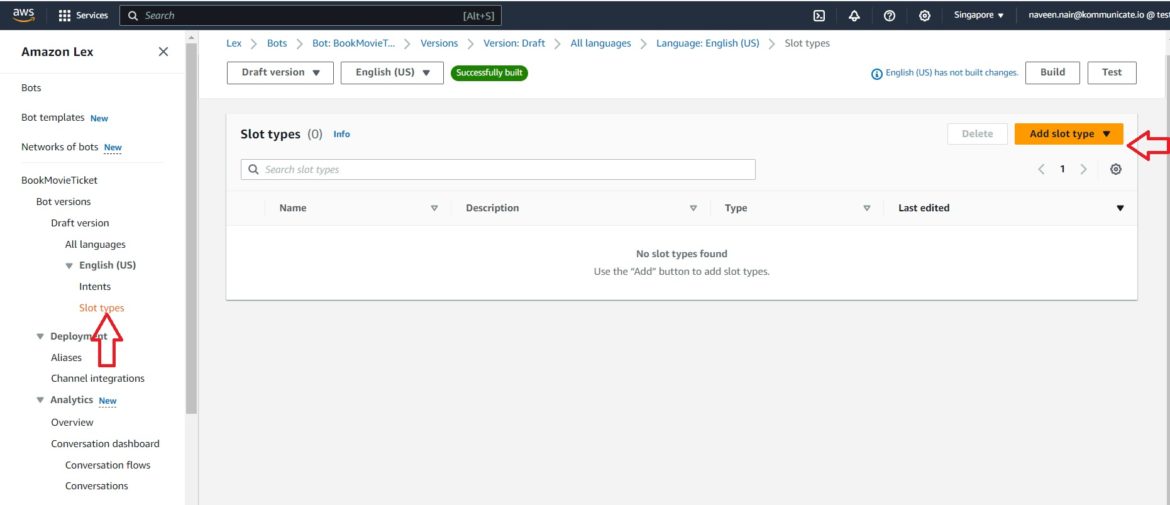
Select the “Slot types” on the left of the screen and click on the “Add slot type” drop-down menu.
Once you save your slot type, you will have to navigate back to the Intents section on the left-hand side. Click on the intent you want to add the slot. Once you have added these slots, it is time to modify your confirmation message.
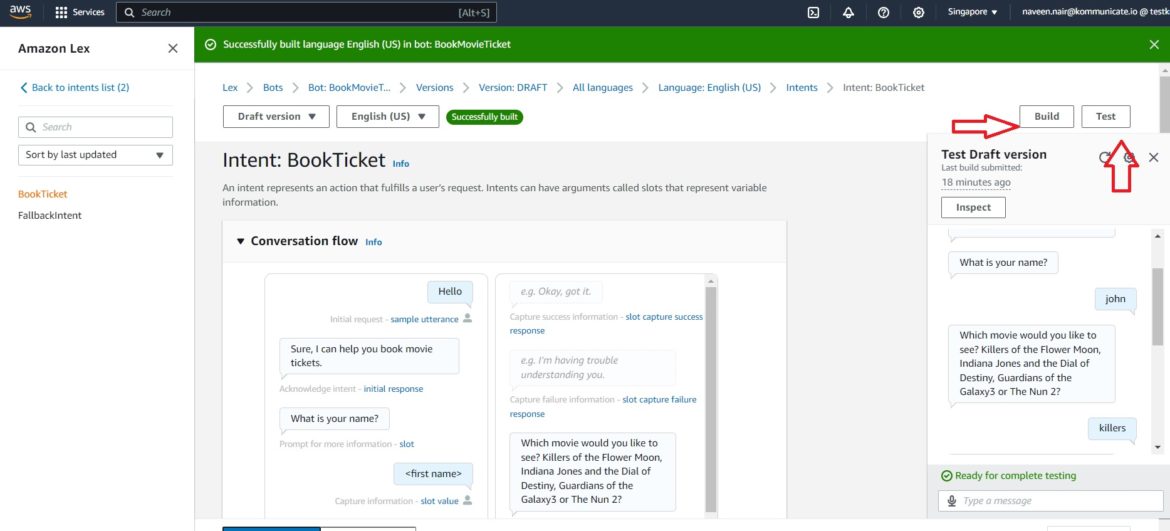
It is now time to save your intent and build and test your bot. This is pretty simple on Amazon Lex. Just click on the “Build” button at the top, and, if there are no errors, the bot is built. It is now time to Test the bot. Click on the Test button, and you are ready to roll.
🎯 Leverage AI for Seamless Conversations.

Confused about our certifications?
Let Our Advisor Guide You